Section 2 of 9
Layout
The bed first
We designed the entire layout around the bed. The whole point of the van was to upgrade from tenting, the main problem of which, for me, is sleep. I’m a bad sleeper at the best of times. A windy, cold, noisy tent was never going to give me a good night’s sleep. So if we were going to do this, we were going to do it right, and “right” meant a proper bed.
Endy makes great mattresses — we have a king at home and it’s excellent. Turns out they also make an RV Queen. Once we found that out, the layout decision became: fit the mattress as close to the rear doors as possible, then build everything else around it. Bed height was set to fit a 10” memory foam mattress with enough headroom to sit up comfortably. Everything else followed from there.
Designing for three
We’re two adults plus Max, our labradoodle. I do have teenagers but they consistently weren’t interested in coming camping with us, which simplified things. Plenty of families make van life work, but cramming more than two adults into a 148” wheelbase is more difficult, and it wasn’t a problem we needed to solve. This is firmly a two-person build.
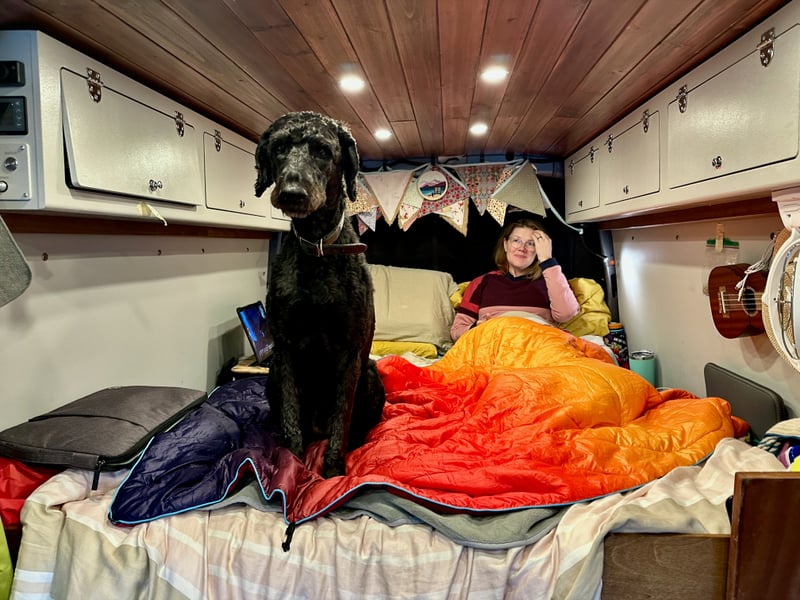
That said, the dog adds a dimension that a lot of build guides skip. Dogs need a place to be when the humans are moving around inside the van — otherwise you’re constantly stepping over each other and the dog is stressed. Max isn’t a small dog. I guess if you have more of a ‘lap dog’ this is less of an issue, but a 70lb labradoodle clearly needs his own space.
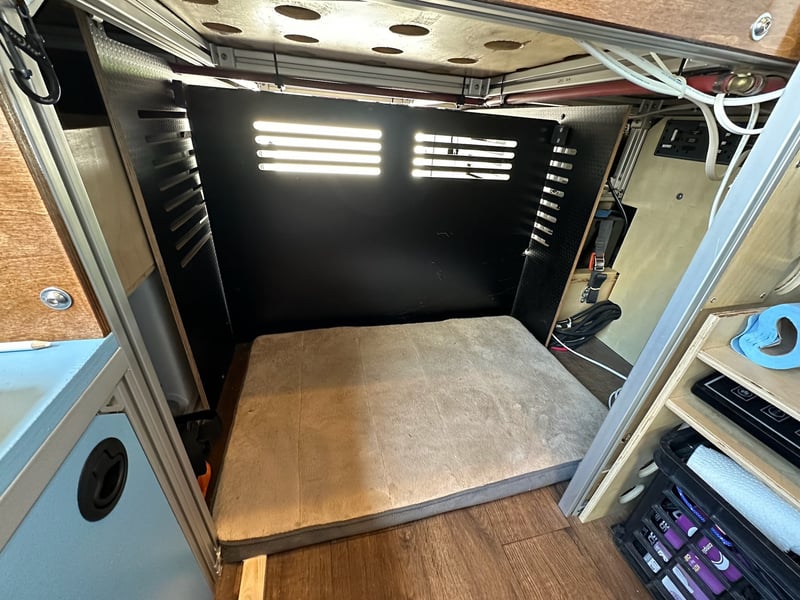
Most fixed-bed builds drop straight from the foot of the bed platform to the floor, with the entire under-bed space used as a “garage” accessed through the rear doors of the van. Sometimes, van builders have a “pass through” door from the main interior to the garage. Instead of this, we pushed the front face of the bed platform back a couple of feet, creating a recessed alcove at foot level that’s still part of the main interior space of the van. That’s Max’ space, with his dog bed. It’s partly enclosed, giving him a den-like experience, and it’s surrounded by storage on the sides so no space is wasted. It’s his spot, and we can say “go to bed” and he’ll go lie down there, out of the way but still near his humans.
This has been genuinely one of the best decisions we made.
(The tradeoff: bikes don’t fit in the garage space because the bed platform sits slightly too low. But we don’t bike with the dog, so it wasn’t actually a trade we had to make — it was just a constraint that didn’t hurt us.)
Galley on the driver’s side
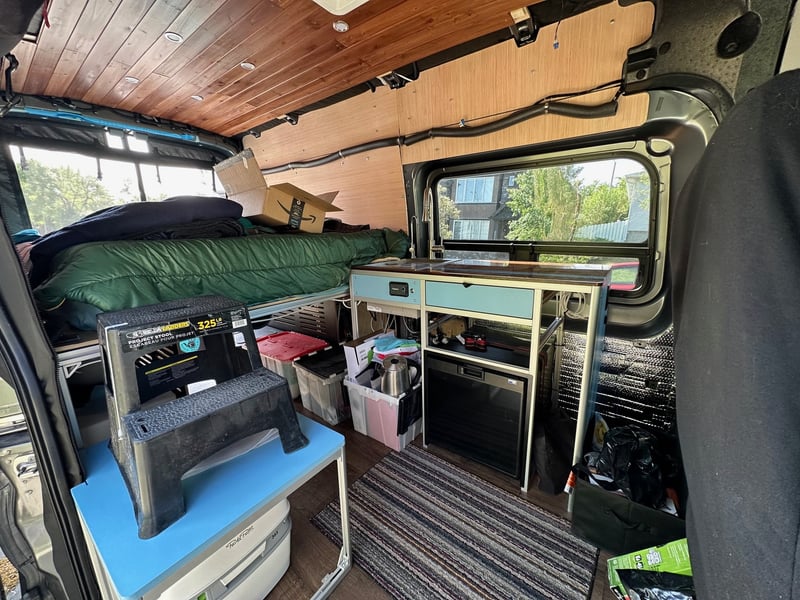
A lot of builds put the galley on the passenger/sliding door side — the logic being that you can cook with the door open and maybe double up the sink tap as an outdoor shower or hose-down. We went driver’s side instead for our galley.
The reason is all about sight lines. We wanted to walk into the van and see from front to back at eye level without lots of stuff blocking the view. We put a bench seat on the passenger/sliding door side — something you can see over — and kept the tall stuff on the driver side.
As you get in the van, you have uninterrupted sight lines from the front seats to the rear. No shower cabinet, no tall fridge (more on those choices later), nothing at eye level blocking the space. It makes the interior feel bigger and more like a room than a corridor. I don’t think we actually lost anything by putting the kitchen ‘inside’ the van — maybe this is space that could be a ‘dinette’ but on a 148 Transit that’s a tough squeeze anyhow.
FarOutRide’s layout guide is one of the most thorough breakdowns out there — galley positioning, bed orientation, dinette vs. no-dinette. Gnomad Home’s Transit build is a good example of a similar-sized van with different choices, useful for seeing what else is possible.
Swivel seats
We treated swivel seats as non-optional. They absolutely transform the front cab. Swivelled around, the two front seats become part of the interior — you get floor space back, the whole space opens up, and you can sit comfortably without one person perching on the edge of the bed.
It also makes the cab usable in bad weather. Instead of being trapped in the back when it’s raining, you can spread out across the whole van.
If you’re ordering new, spec factory swivels if that option exists — it’s cleaner and almost certainly cheaper. For a retrofit, ours are Scopema, which are vertically thinner than most aftermarket options. Seat height matters more than you’d think once you’re living with it. FarOutRide’s swivel guide for the Transit is worth reading before you commit to anything.
The throwaway build
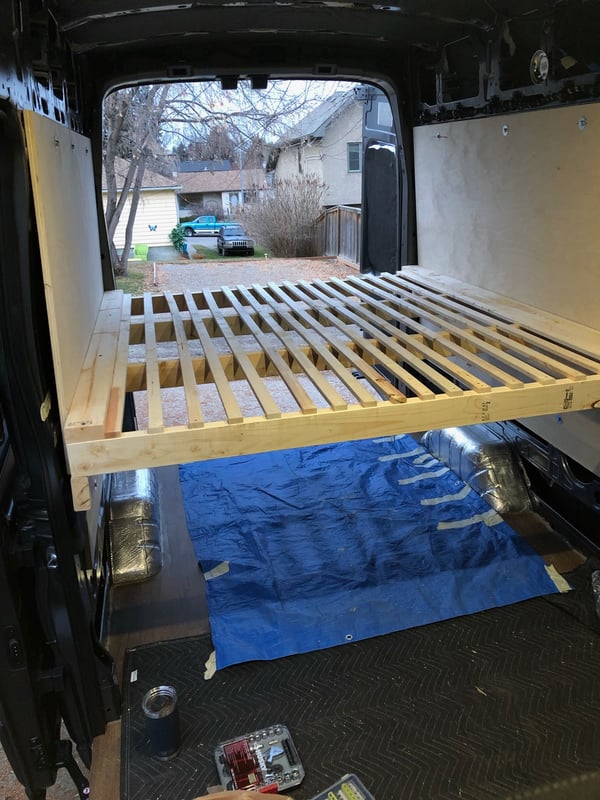
We didn’t jump straight to final materials. Instead, we built a rough version first — 2x4s, plywood, nothing precious — just enough to try the layout and start using the van. In particular, we didn’t know if the “galley on the inside” layout would work for us; the simple wooden build proved it did and let us build “for real” with confidence.
We followed this pattern throughout. We’d build a bit, go camping, learn something, come back and adjust. Some things don’t iterate easily (layout is 4D Tetris — changing the bed position ripples through everything), but being able to use the van throughout the build process told us things we never would have figured out on paper. One technique we should mention here is CAD — Cardboard Aided Design — as espoused by George at Humble Road. He mocks everything up from cardboard and has his clients walk through the build before they commit. We did this for a few things such as our overhead cabinets.
The throwaway build also meant we were camping in a half-finished van instead of waiting until everything was done. That’s important, the whole point is to go camping not be stuck building forever, and an incremental build gets you out there sooner.